

Several tools, in PaintShop Pro, will have a Smart Edge option to check or uncheck. But do you know what that is for? Let's have a look at this function as it is used with different tools.
The Smart Selection Brush
This tool was added with version X6. This tool will select the similar color as where you you are clicking and it will search for any obvious "edge". Without the Smart Edge checked, the Smart Selection Brush will mainly select around the brush itself. Let's look at the difference it will make.
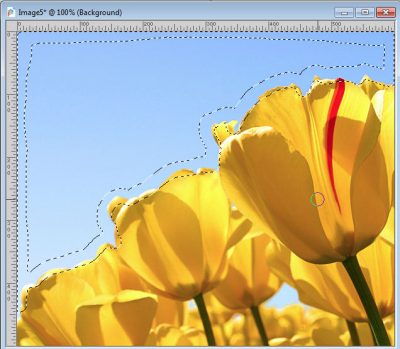
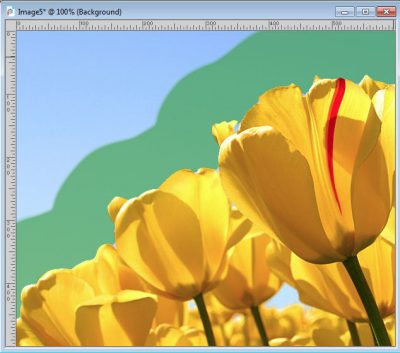
This is the Smart Selection Brush without the Smart Edge checked. Even if I tried to brush close to the edge, you can see that the selection is not very accurate in selecting the sky and not the flowers.
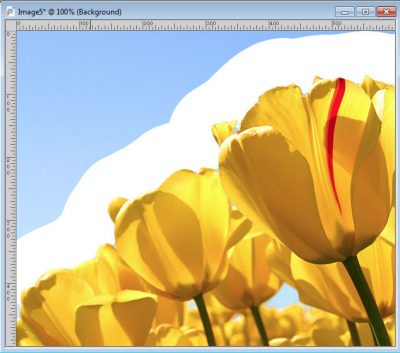
But with the Smart Edge checked, I didn't have to brush all around the area and the selection went all the way up to an obvious edge of the flowers.
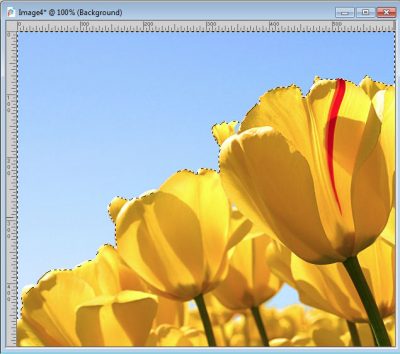
It is not perfect, but it is so much better and more accurate than without the Smart Edge selected and it goes faster too!
The Clone Tool
The Clone tool also has the option to check the Smart Edge. It will allow you to add elements up to the edge of something as if it was placed behind, without having to make a selection beforehand. Let's see how I could try to add more flowers behind the existing ones.
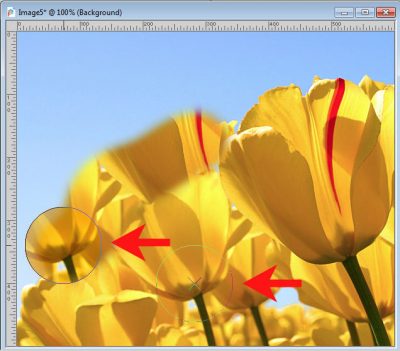
With the Clone tool, I can hardly add those flowers behind without making a selection first, as it will overlap the edge of the flowers.
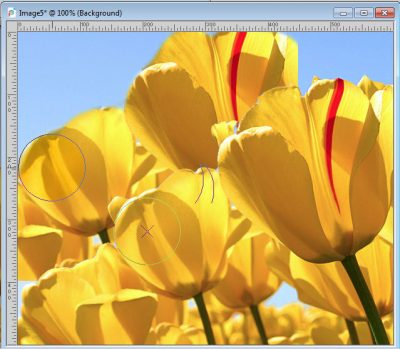
But once the Smart Edge option is checked, it is much easier to place additional flowers "behind" the existing ones.
The Brush tool
This is a common tool to use and if you want to brush close to another element, you can do it the hard way, and adjust the size of the brush, and get very close to the edge, or you can use the Smart Edge function.
Using the Brush tool without the Smart Edge, my brush stroke will look something like this if I am not super careful.

Of course, I could have made a selection on the edge of the flowers, but with the Smart Edge checked, I can just brush close to the flowers, and the brush knows where to stop.
It is almost like magic as it saves so much time!
The exact same effect would be achieved with the Air Brush tool.
The Lighten/Darken tool
This tool allows you to lighten or darken an area and just like the Brush tool, you would have to either make a selection ahead of time or be very meticulous to brush very close to the edge. Here is what the Lighten/darken tool would do while setting the Hardness to the max of 100 and the Opacity to 100.
With the Smart Edge unchecked, this is the result you would get:

But with the Smart Edge checked, here is what you get in one brush stroke:
Most of the tools in that drop-down list also have the option for the Smart Edge and behave pretty much the same way. So you can use the Smart Edge with the Dodge, Smudge, Burn, Soften, Sharpen, Emboss, Saturation Up/Down, Hue Up/Down, Change to Target and Color Replacer. This will be great if you need to Change to Target, here is what you can get with a quick brush of the cursor (I could have been more careful though):

The Eraser tool
Now, the Eraser tool will behave just like the Brush tool and using it with the Smart Edge checked will make this tool behave somewhat like the Background Eraser if you have a definite edge to butt against.
Without the Smart Edge checked, here is the result:
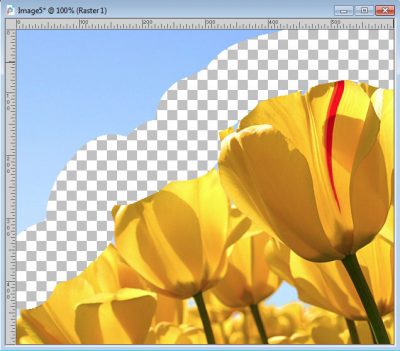
But with the Smart Edge checked, it is so easy to delete that sky in the picture!

The Picture Tube tool
If you have some Picture Tubes that are scattered, it would be a good time to use the Smart Edge as you might want to have the tubes only on one side. For example, you might want to add stars in the sky but avoid the mountain or the cityscape. You have to remember that you need a neat edge that the system can identify. If the edge is faint, or of similar color, it might not work.
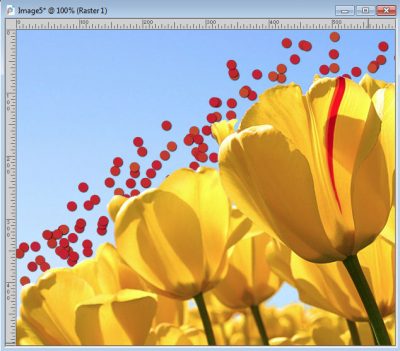
Let's scatter some confetti, on our image without the Smart Edge on. This is what we would get:

But with the Smart Edge checked, we would avoid the flowers.
Did you know about this feature and all the time it could save you? Go ahead and check it out. Play with this feature and you can even show us your results in the forum. There is always a thread for various projects, so take advantage of it.


6 thoughts on “What is the Smart Edge?”
Thank you so much for the tips I’ve been using PSP forever and never knew lol..
Glad to have helped you learn something new about PSP.
thank you Cassel im goin to try it now , a great tip !!
thank you for the beautiful water backgrounds i surely going to use them
greetings Bram
I thought the Smart Selection brush just didn’t work for me until a couple of months ago. I must have turned on the Smart Edge without realizing it because it works fine now. I love that you can use it on other tools. I can’t wait to try it. Thanks, Carole.
thank you Carole, has anyone noticed that when cloning there is now an icon that pops up to aline you perfectly, unless u have shaky hands like me.
Yes, and that is a fairly new addition too! Just a couple of versions ago only. Very handy feature!