

Scrapbooking is all about expressing your creativity in various ways. Creating your graphics with Paintshop Pro to use as elements to add to your story is one way to do it. But how about personalizing your titles with your own text? Not using fonts or alphas, but actually making use of handwritten words and phrases and using them to decorate your digital scrapbook pages.
Easy way
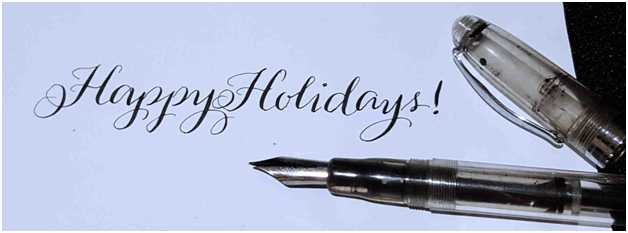
There is a fairly easy way to do it and you don’t have to buy an expensive tablet to create it. Simply write your title/words/phrases on a white paper with a black marker, pen, or any favorite lettering tool.
Scan it
Set your scanner to scan your word art to at least 300dpi. TIP: If your initial paper is not perfectly white nor your text perfectly black, go to Adjust > Brightness and Contrast > Threshold and it will turn to black and white (no grey, no color).

Blend it
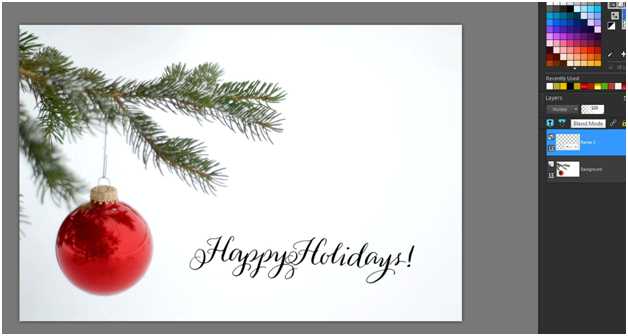
This image can already be used by itself and it can be used as an overlay to any existing image. Simply copy the text image over a background and set Blend Mode to Multiply.
If you want to add shadows or any other effect to this text image, you’ll need to remove the white background first.
 Extract it
To do this, you can Select All (Ctrl-A) then go to Selections > Modify > Select Color Range then select White as a color and check Subtract. Adjust Tolerance and Softness until there is no more visible white background. Then click OK.
Next, Invert Selection (Ctrl-Shift-I) and hit the Delete key on your keyboard. Deselect by pressing Ctrl-D. You can even save a copy of this layer so you can easily use them as an element to your other digital scrapbooking projects.

Shadow it
Now go to Effects > 3D Effects > Drop Shadow and set it to 100% opacity and 0 blur. You can choose grey or any other color for the shadow.

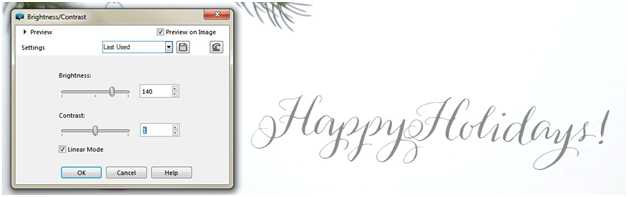
Colorize it
You can also change the color of the text on the image to another color. You can achieve it in just two quick steps: First, go to Adjust > Brightness and Contrast > Brightness/Contrast and adjust the settings for brightness to make it medium grey.
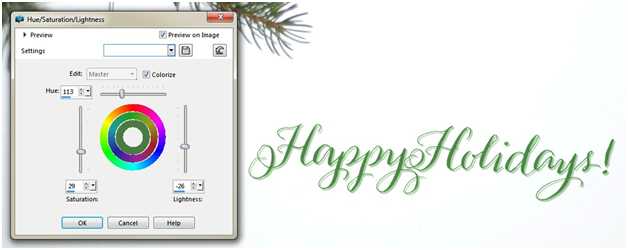
Next, go to Adjust > Hue and Saturation > Hue/Saturation/Lightness and now change the color to whatever you like from there.
Customize it
Additionally, you can also jazz up your text image by applying a pattern. Using the Flood Fill Tool , pick a Pattern from your Materials Palette, and apply it on the text itself.
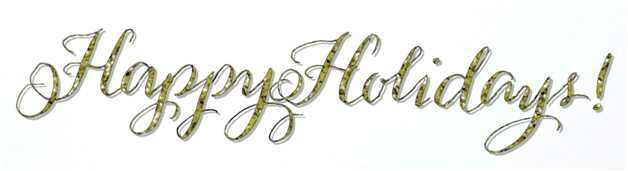
Enjoy!
You can even use this simple technique for your upcoming holiday greeting cards and gift tags.


As you can see there are many ways to get creative with a simple handwritten text converted into a digital element so you can use it on your scrapbooking projects with Paintshop Pro. Try this the next time you’d like a more personalized title for your scrapbook pages or if you simply want customized word elements for your projects. And don't hesitate to show us or link to your final project, in the comment below, or on our Facebook page.
If you want a printable version of this blog post to use as a reference, simply log in or register.


2 thoughts on “Converting handwritten text into an elements for digital scrapbooking”
Thanks so much, I can’t wait to try it
This is so COOL!!! After I practice a bit, with my own writing, I want to see if this would work on a few pieces of Mom’s handwriting, to share that history with the family!