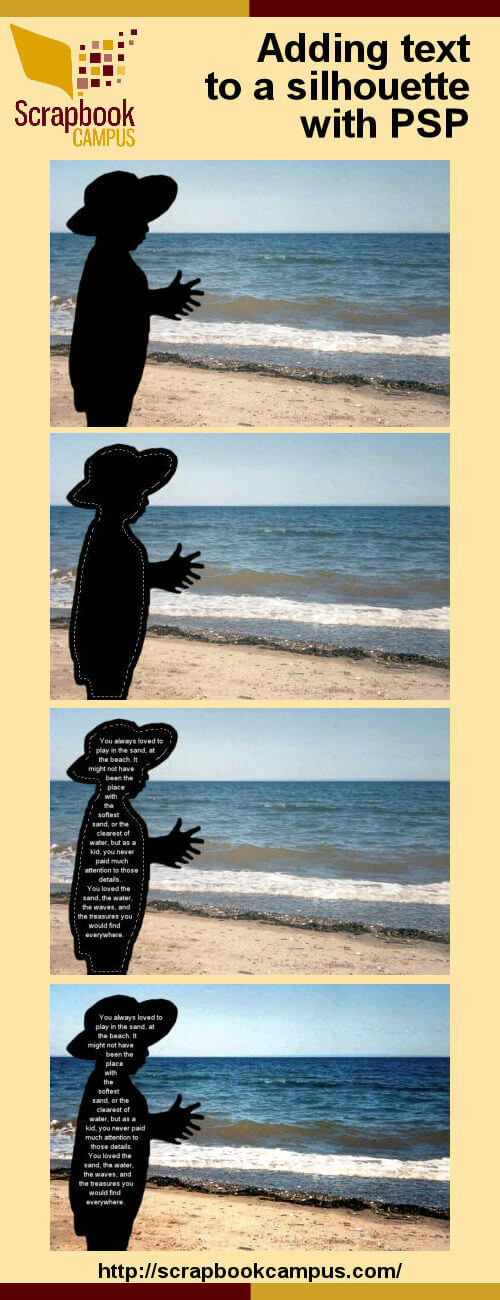
If you have a photo that you used to create a silhouette, what will you do with it? Of course, you can simply add it to another background to show it off, but you can do even more. You can use it to add text in a very creative way. Let's see how you can take an ordinary photo and make something new using Paintshop Pro X8.
Fix the photo
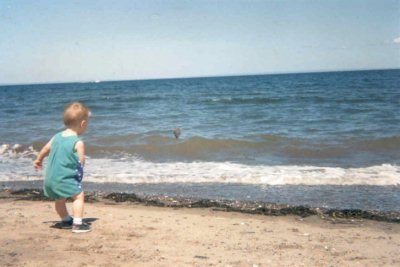
I started with a photo that was far from perfect, but with Paintshop Pro, that is not a problem as it is easy to fix. I straightened the horizon with the Straighten tool, then, I removed the child using the freehand selection tool and the Magic fill. It is not that I didn't want him there, but I had a silhouette that looked better (in this picture, it looks like he is missing an arm).

Add the silhouette
Now it is time to add the silhouette I created using another photo of the same child at the same beach. You can read the tutorial to create the silhouette HERE.

Select the silhouette
Using the Magic wand, it is now easy to select the silhouette. However, you likely don't want to have text right up to the edges so once you have the basic shape selected, you can go to Selection > Modify > Contract. The amount you will contract will obviously depend on the size of your project.

Adjust the selection
As you can see, there is a little section for the hands that might look odd when I have text added. That is a simple fix. Using the freehand Selection tool, and holding the Ctrl key, I can select the area to remove from the overall selection.

Time to add the text
Using the Text tool, click inside the selection, and start typing your text. You can type continuously as the text wrapping function will automatically change line when the text reaches the end of the selection. You can adjust the font size, the font, the alignment just like you would on any other piece of text.

Deselect
Once you are happy with the way the text is displayed, you can deselect with Selection > Select None or Ctrl-D.

Final touch
At this point, you can tweak the background image, add more elements, frames, etc. Here, I decided to pop the colors a bit using the Levels (Adjust > Brightness and Contrast > Level). You could apply other effects, like adding a vignette effect, blending the image, fading the edges, and more. You are the creator. You are the artist.

What do you think? You can do the same thing with a silhouette and the text wrapping function available in Paintshp Pro X8. This is a different way to create a scrapbook page or even a card. Any theme can be used.
Do you know someone who would like this tutorial? Share this infographic on Pinterest. Just hover over the top and you can pin it by clicking the Pinterest icon.