
With version X9, Corel introduced templates to its PaintShop Pro. Those templates are meant to help users create graphic projects faster. They range from social media headers to greeting cards or even to business brochures. For anyone new to the process, let's have a look at how you can use those.
A question of name
If you are familiar with digital scrapbooking, you might be a little surprised by the use of the word "Template". In fact, in scrapbooking, templates are layered projects where each layer represents a particular element that will either be trimmed to that size (photo or papers) or replaced by elements (embellishments). On the other hand, Quick Page is typically the name used to label those pages where you have everything merged into one layer, but with "windows" to place the photos behind. The "templates" referred to in this article, are somewhat of a mix between the two.
Select a template
The various templates are accessible in one of three ways:
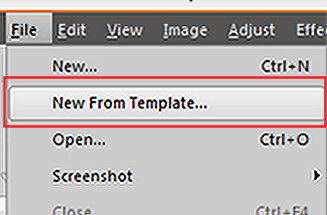
From the File menu, if you go File > New from Template:
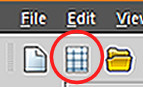
You can access it from the menu bar directly with the newly added icon:
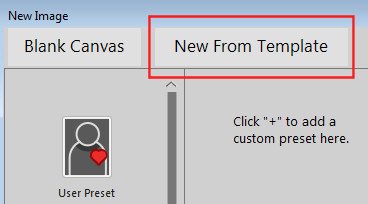
Or you can access it from the second tab if you had opened the New Image dialogue window:
Choose your template
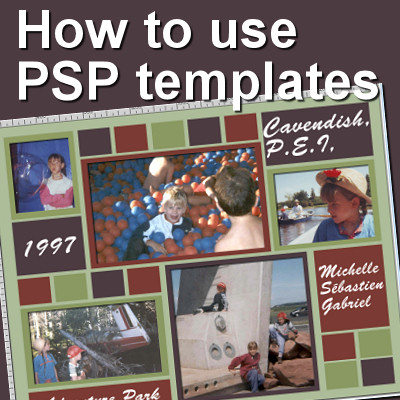
On the left column, you have various categories of templates, whether you want a Facebook header or a greeting card. Select the category you want to pick from, and the second column will display the various templates available in that particular category. A few templates are free, while most are paid. Let's choose the Collage category, and scroll down to the 11x8.5in Scrapbook 02. This is a free template available to you (if you prefer a square version, there is another one a little further down, called 3600x3600px Scrapbook 02 that is also free).
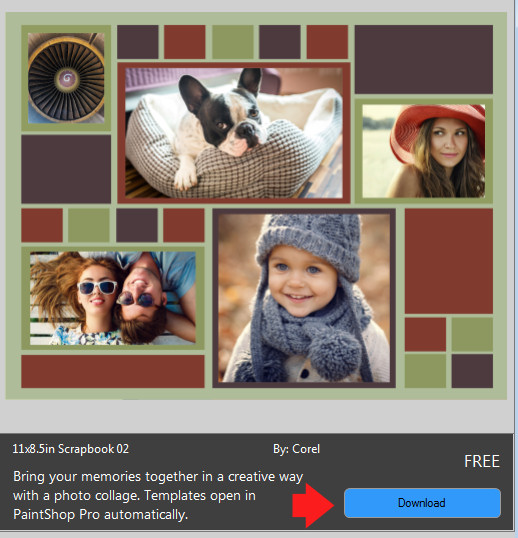
Click the Download button and that area will now change.
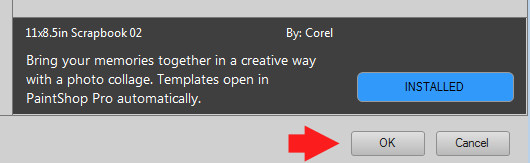
Click on the OK button and the template will open in your PaintShop Pro.
Use the template
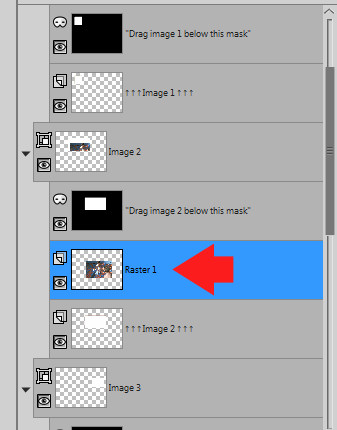
Once the template opens in your PaintShop Pro, you will notice that there are lots of layers to work with. The very top layer is like the "cover" for the particular project. It is what contains all the shapes and colors and designs. Those are not editable per say.
Many layers will appear black with a white shape. Those layers are masks. They will work exactly as you would expect: by masking anything that is not going to be visible on the template. This allows you to use an image that might be larger than the "hole" it will appear in, and you won't have to trim it. It is like sliding a photo behind a little window.
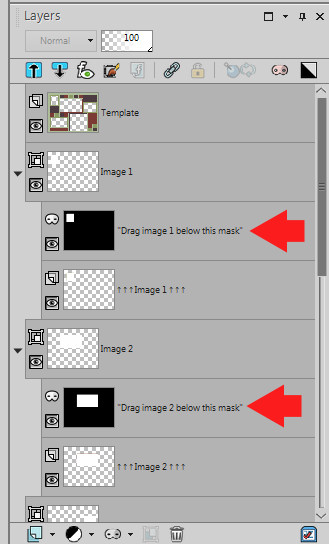
Underneath each of those mask layers, are other layers called Image1, Image2, etc. Those are simply placeholders since the program can't create a mask with no layer to cover.
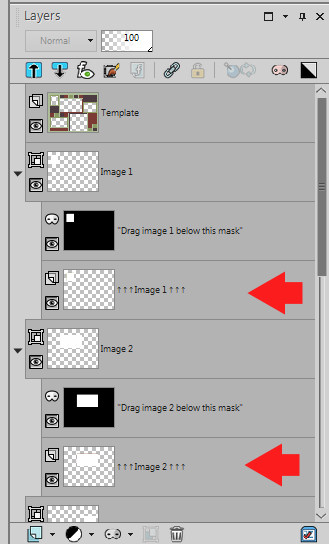
The next step is simply to add your own photo under the mask layer. You can drag and drop your photo directly onto the template project, and it will be placed just above the active layer. If it ends up on the wrong layer, you can easily drag it above or below, in the layer palette.
However, notice that the image was, by default, placed in the center of the project. This is likely not the location you want for the image.

In order to adjust this, you need to move the image where it would show completely behind the designated area. BEWARE that your image, being under a Mask layer, is now part of a GROUP of layers, and they are going to move together. That means that if you try to move the photo with the Move tool, it will also move the Mask layer so it won't be useful. In order to move the image alone, you need to activate the Pick tool (K for a shortcut).
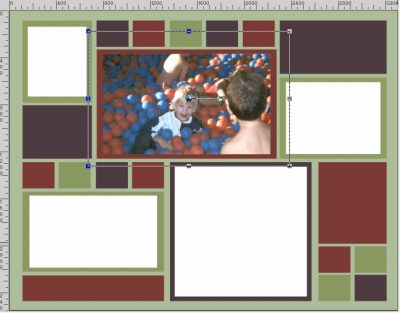
While the Pick tool is active, and the Mode is set to Scale, you can adjust the size of the image, if you want to focus on a single area or if you want to resize it to have a wider view. If you want, you can also rotate your photo, and since it is under a mask, nothing will show up on the adjacent "window". And no trimming needed either as your photo is still complete.
Repeat
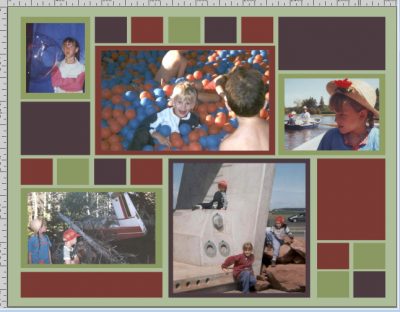
Continue with these steps until all the spaces are filled with your photos.
A few extras
Although your project might be done at this point, and you are happy with it, you can still add a few details to make it really personalized. They are optional.
Shadows. If you want to add some shadows to your overall project, you can do so simply by activating that top layer that holds all those "holes" and applying a basic Drop Shadow.

Dates, names, and locations. You might remember those details NOW, but trust me, you might forget them in 10 years!
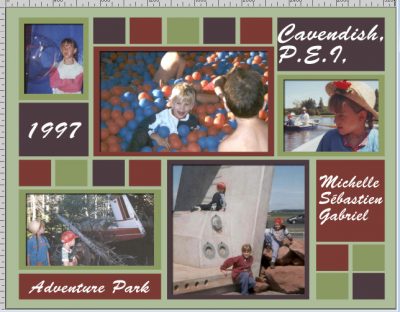
Save your project, in .pspimage format, so you can come back and tweak it later if needed, and then save it in.jpg format to share with your friends and family, on social media or in online galleries.
What project will you create with the PaintShop Pro templates? Show us some examples!


3 thoughts on “How to use PSP templates”
And downloaded templates will appear under user – documents – corel paintshop pro – 2020 (for instance) – download – template.
Thanks for pointing out the templates, Cassel. I’ve had PSP x9 for a while and didn’t see them. You mentioned we couldn’t edit the top layer, but I didn’t like the colour scheme too much. So, I used the magic wand selection tool on the top layer to choose each solid colour, one at a time, then the delete key, then the flood fill tool to change it to a colour of my choosing. Then I saved the newly-coloured template with a new name. Thinking about that process now, I should probably have promoted each selection to it’s own layer, then I could recolour them again and again.
Liz
Glad it made you discover something new about PSP. Yes, you can edit that top layer with all the workaround you mentioned. I simply meant that the top layer was not “editable right out of the box”, as if all those elements were on separate layers. With your skills, you are probably able to create your own templates/projects too. The templates provided in PSP are probably going to be used mostly by beginners or users who are in a hurry to complete a project! 🙂